
Appearance
Getting Started
This page takes you from a fresh install to editing your first page. The installation step is usually done by your developer or hosting provider. Everything after it happens in the Magento admin.
Requirements
- Magento Open Source or Adobe Commerce 2.4
- PHP 8.2 or newer
- Node.js 22 or newer on the server or on the machine that builds your store, used to build the theme
1. Install Lynx
Copy the Lynx package into your Magento installation as described in the package you received, then run these commands from the Magento root folder:
bash
bin/magento setup:upgrade
bin/magento lynx:static:deploy OOCS_LynxVue
bin/magento cache:flush
To build the React edition, use OOCS_LynxReact instead of OOCS_LynxVue, or name both to build both.
Turn off Magento's JavaScript and CSS merging
Lynx ships its scripts and styles already optimized. Magento's own merging and bundling options would break them, so they must stay off for every store view that uses Lynx. They are off in a fresh Magento install, but some stores turn them on. Run:
bash
bin/magento config:set dev/css/merge_css_files 0
bin/magento config:set dev/js/merge_files 0
bin/magento config:set dev/js/enable_js_bundling 0
bin/magento config:set dev/js/move_script_to_bottom 0
bin/magento cache:flush
In developer mode the same options are in Stores › Configuration › Advanced › Developer, under CSS Settings and JavaScript Settings. If one of them is set on a website or store view, add --scope=websites --scope-code=<code> or --scope=stores --scope-code=<code> to the commands above.
TIP
Installing Lynx does not change your live store. Your store keeps its current theme until you switch to Lynx in the next step.
2. Switch your store to Lynx
- In the admin, go to Content › Design › Configuration.
- Edit the store view you want to change.
- Set Applied Theme to Lynx Vue or Lynx React, then save.
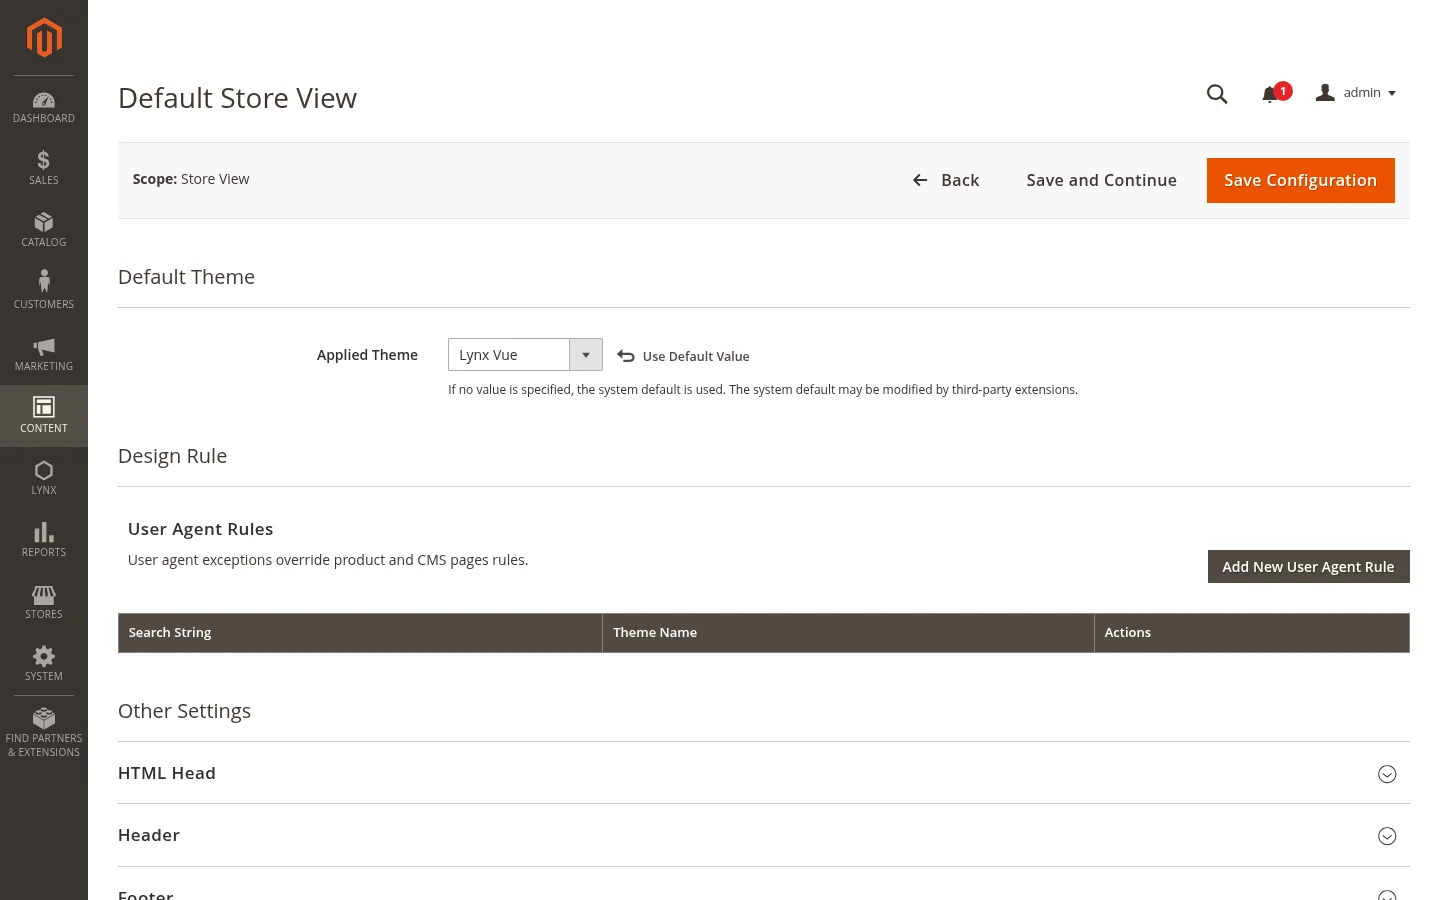
You can switch one store view at a time. This is a good way to try Lynx on a test store view before your main one.
3. Choose the design to show
A design is a complete look for the store: every page layout plus the design settings. Lynx installs a default design that you can use as a starting point.
- Go to Stores › Configuration › Lynx › Design.
- Pick a design in Active Design. This can be set per website or store view.
- Save the configuration.
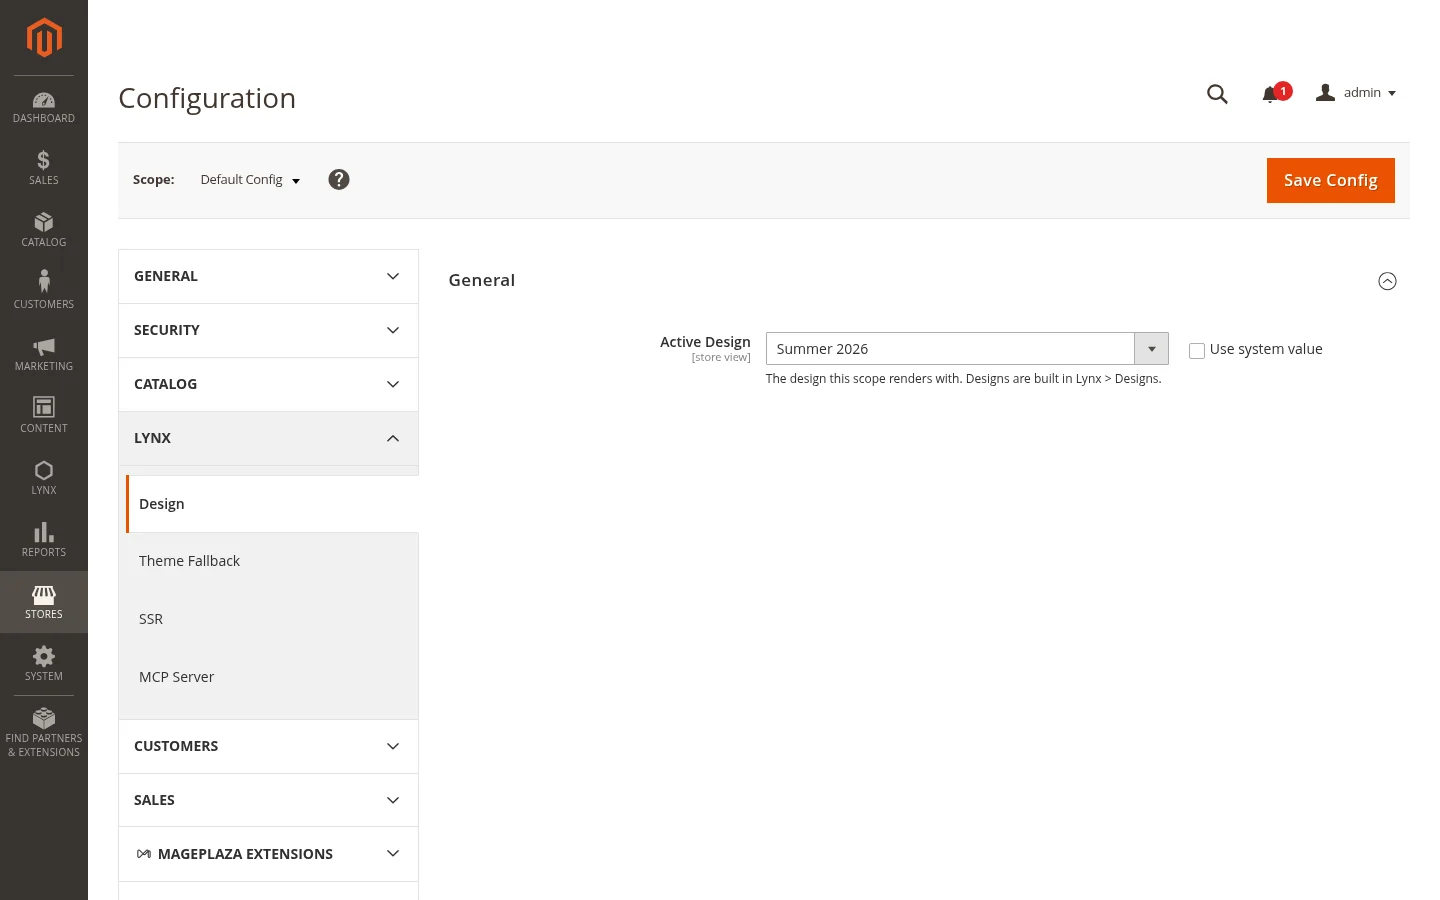
4. Make your own copy of the design
The default design is read-only, so that you can always go back to it. To make changes, copy it first:
- Go to Lynx › Designs.
- Open the Select menu of the default design and choose Duplicate. Rename the copy with Edit.
- Choose Build on the copy to open it in the editor.
When you are happy with your copy, set it as the Active Design from step 3.
5. Edit your first page
The editor opens on the home page. Click any block in the preview to select it, change its settings, and press Save. Your changes appear on the store straight after saving.
Continue with The Editor to learn your way around.
Changes not showing?
If Magento's full page cache is on and an old page still shows, refresh the cache in System › Cache Management.